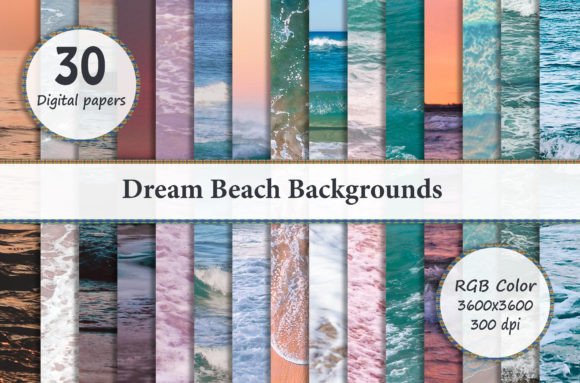
Transform Your Designs with Dream Beach Backgrounds
There is a specific kind of creative block that hits when you have a great concept but a flat, uninspiring canvas. Whether you are designing a wedding invitation, a social media header, or a physical product like a t-shirt, the foundation of your image dictates the final impact. This is where high-quality digital papers become essential assets in a designer's toolkit. The Dream Beach Backgrounds collection offers exactly what the name implies: a curated set of 30 digital backgrounds designed to evoke the tranquility and aesthetic of a coastal paradise.
This set is not just a random collection of stock photos; it is a cohesive design resource. Each background is sized at 3600 x 3600 pixels with a resolution of 300 DPI. For the uninitiated, these specifications are critical. The square aspect ratio makes these files incredibly versatile for modern digital platforms, such as Instagram posts or square business cards, while the 300 DPI resolution ensures they remain crisp and professional when sent to a commercial printer. You are working with a premium design asset that bridges the gap between digital convenience and print-ready quality.
The Technical Workflow: Layers and Compatibility
While the files are delivered as standard JPEGs, their true power is unlocked when you understand how to manipulate them within professional software. These backgrounds are designed for compositing. They serve as the "base layer" in your stack. If you are using Adobe Photoshop or Photoshop Elements, you have the full power of layer blending modes at your disposal. You can place your text, logos, and graphic elements on separate layers above the background, allowing for non-destructive editing.
For users of Paint Shop Pro or similar raster graphics editors, the workflow remains largely the same. The key is layer management. You want to ensure that your background layer is locked or placed at the very bottom of your stack to prevent accidental shifting.
A specific note for Adobe Lightroom users: Lightroom is primarily a raw photo processing tool, not a compositing tool. However, if you use Lightroom for your workflow, you can still utilize these backgrounds if you have a plugin that allows for layer functionality, or if you plan to round-trip your images into Photoshop for the final composition. The goal is to ensure you aren't trying to force a layer-based design into a flat editing environment.
Practical Applications: From Digital to Physical
The versatility of the Dream Beach Backgrounds is one of its strongest selling points. Because the aesthetic is broad—relying on natural textures, colors, and patterns rather than specific typography—it fits into a wide variety of niches. Here is how you can practically apply these assets:
- Scrapbooking and Digital Albums: This is perhaps the most organic use case. The beach theme provides a nostalgic, warm backdrop for family photos, vacation memories, or summer event recaps. The high resolution ensures that when you print your album pages, the texture of the background remains visible.
- Invitations and Greeting Cards: For small business owners or event planners, these backgrounds provide an instant "mood." A beach background instantly signals a relaxed, celebratory vibe, making it perfect for destination wedding invitations, save-the-dates, or summer sale announcements.
- Product Mockups and Design: If you sell physical goods, presentation matters. These backgrounds can be used to create mockups for t-shirts, cell phone covers, or jewelry. Placing a product image on a textured beach background adds context and visual interest compared to a stark white studio shot.
- Web and UI Design: In the realm of website design, full-page background images can sometimes slow down load times or clash with content. However, these textures work exceptionally well as hero section backgrounds, footer textures, or social media graphics where a "lifestyle" feel is required.
Design Strategy: Pairing and Hierarchy
Using a busy or textured background requires a thoughtful approach to typography and layout. You cannot simply drop a complex script font over a detailed beach texture and expect legibility. This is where understanding visual hierarchy and font pairing becomes vital.
When working with Dream Beach Backgrounds, consider the following design principles:
- Contrast is King: If the background features light sand and blue water, your text needs to be dark enough to read easily. Alternatively, if the background is a deep sunset, white or cream text works best. Never sacrifice readability for aesthetics.
- Use Drop Shadows or Overlays: A subtle drop shadow behind your text can lift it off the background. Alternatively, consider placing a semi-transparent shape (like a white rectangle at 50% opacity) behind your headline. This ensures your message is the focal point, not the background image.
- Font Selection: Since the backgrounds evoke a natural, organic feel, your typography should complement that.
- Sans Serif Fonts: Clean, modern sans-serifs (like Montserrat or Helvetica) provide a nice contrast to the organic shapes of nature, creating a professional, "lifestyle brand" look.
- Script or Handwritten Fonts: For a more romantic or casual vibe (like a wedding invite), a flowing script font works well, but ensure the x-height is large enough to remain legible against the texture.
Commercial Viability and Brand Consistency
For entrepreneurs and marketers, brand consistency is everything. Using a set of 30 coordinated backgrounds allows you to maintain a consistent aesthetic across multiple campaigns without looking repetitive. You can cycle through different beach scenes—some featuring waves, others featuring sand or tropical foliage—to keep your visual content fresh while maintaining the same "brand mood."
Whether you are creating magnets, paper crafts, or nail wraps, the 3600px size gives you plenty of room to crop. If you need a vertical image for a phone background or a horizontal strip for a website banner, you can crop the square source file without losing quality, provided you don't scale up beyond the original dimensions.
Ultimately, these backgrounds are tools to solve creative problems. They remove the friction of finding a suitable canvas, allowing you to focus on the message, the layout, and the connection with your audience. By integrating these assets into your workflow, you elevate the production value of your projects, turning simple designs into polished, professional visual communications.